Systems Engineer - Pure Storage

Category: Uncategorized

Setup a new host and volume

NOTE – If using FC, ensure that your host is correctly zoned to be visible to the FlashArray (This doesn’t apply to iSCSI hosts)

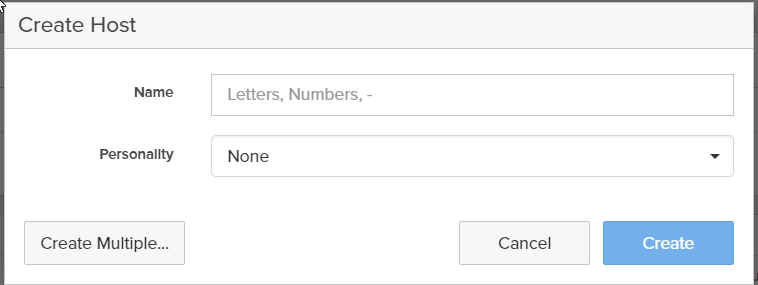
Step 1 – Create the host.

Check it host exists, if not click on the + sign (Step 3)
Provide a name and a personality if applicable (Personality not necessary but allows for application specific features to be used
SQL Host example

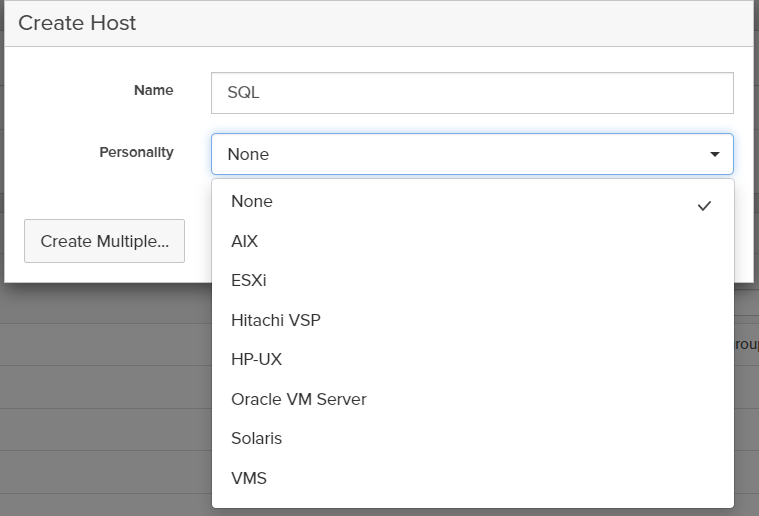
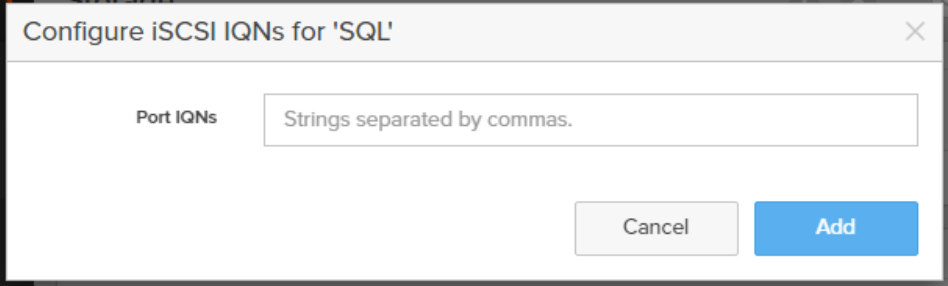
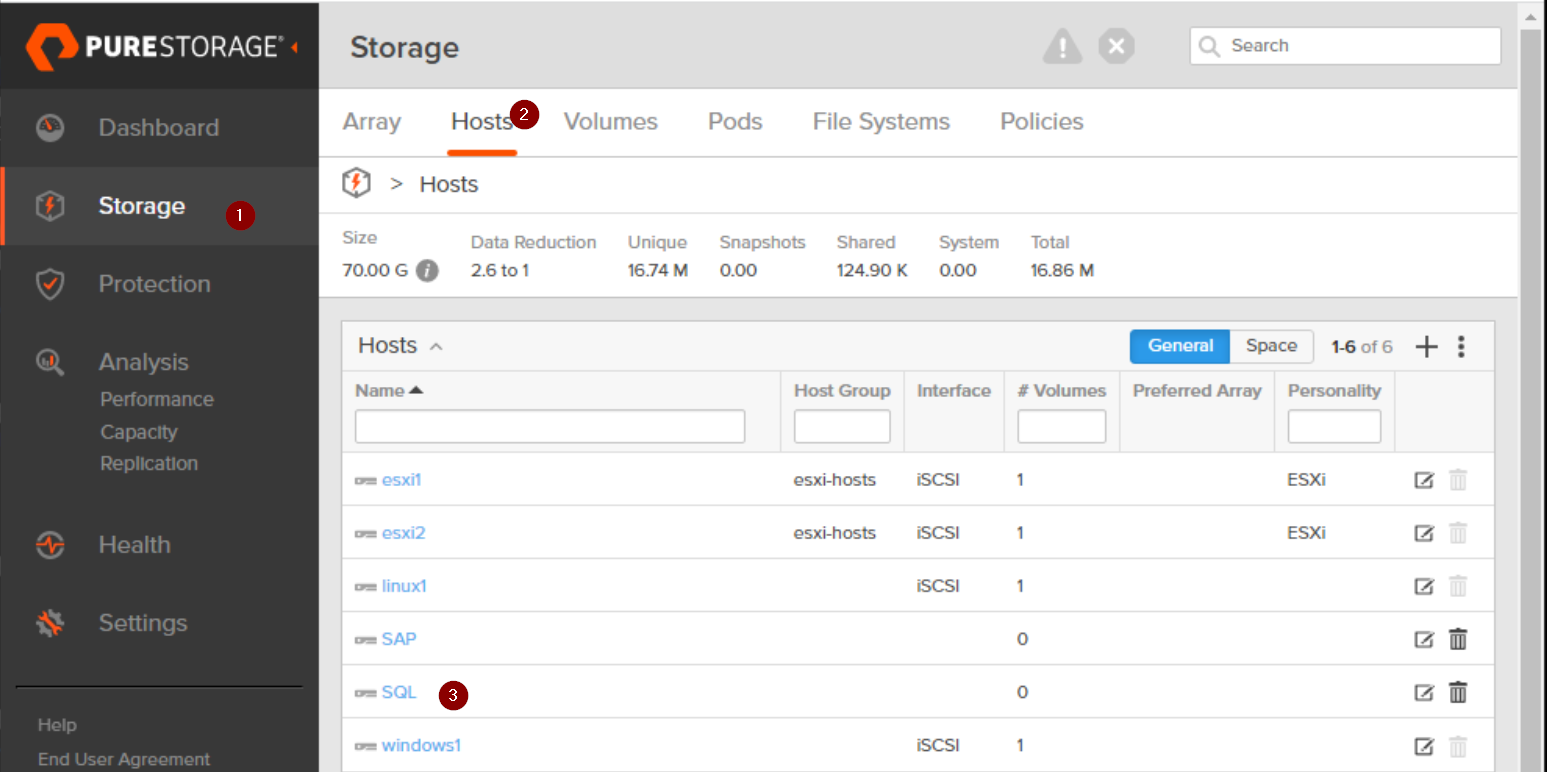
Step 2 Configure the new host.

Click on the host name you wish to configure
Click on the hamburger (1) and for FC use Configure WWNs, for iSCSI use Configure IQNs
FC Specific
iSCSI Specific

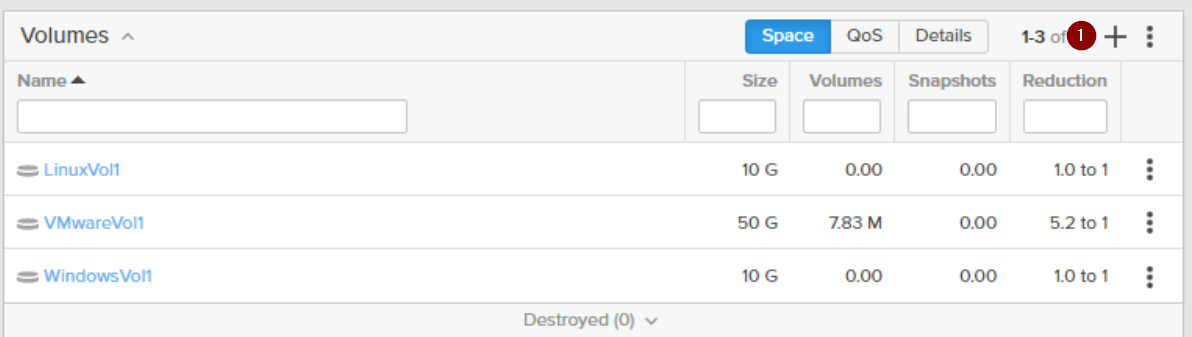
Once the host has been configured correctly you can now add a volume!

iSCSI configured host with IQN from esxi host (Example)

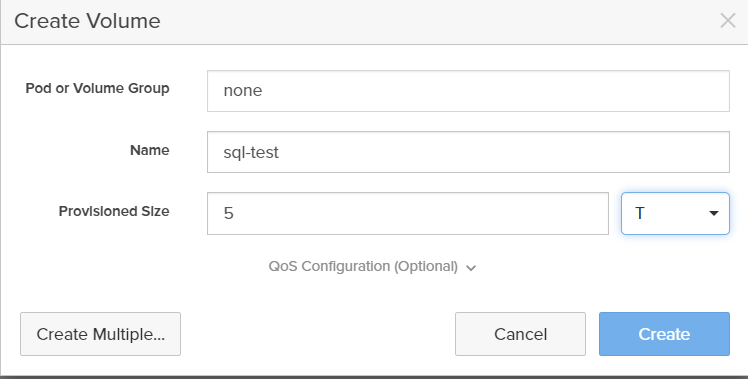
Step 3 – Configure volume for host

Navigate to the Storage pane, click on Volumes
Click on ( + ) to create a new volume
Set up the volume. You only need a name and size!

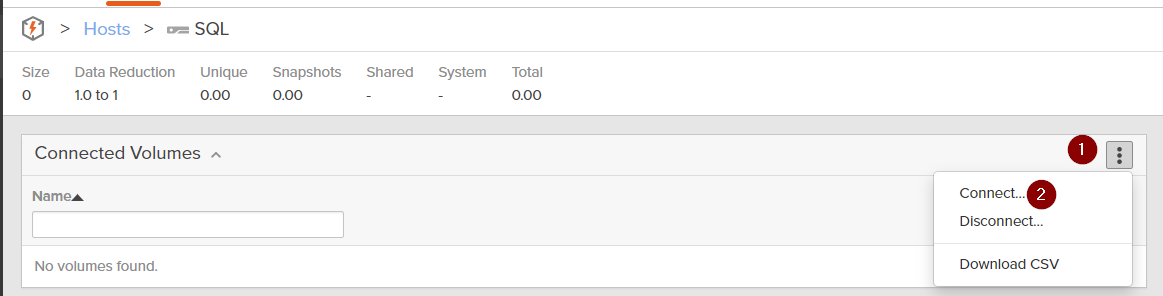
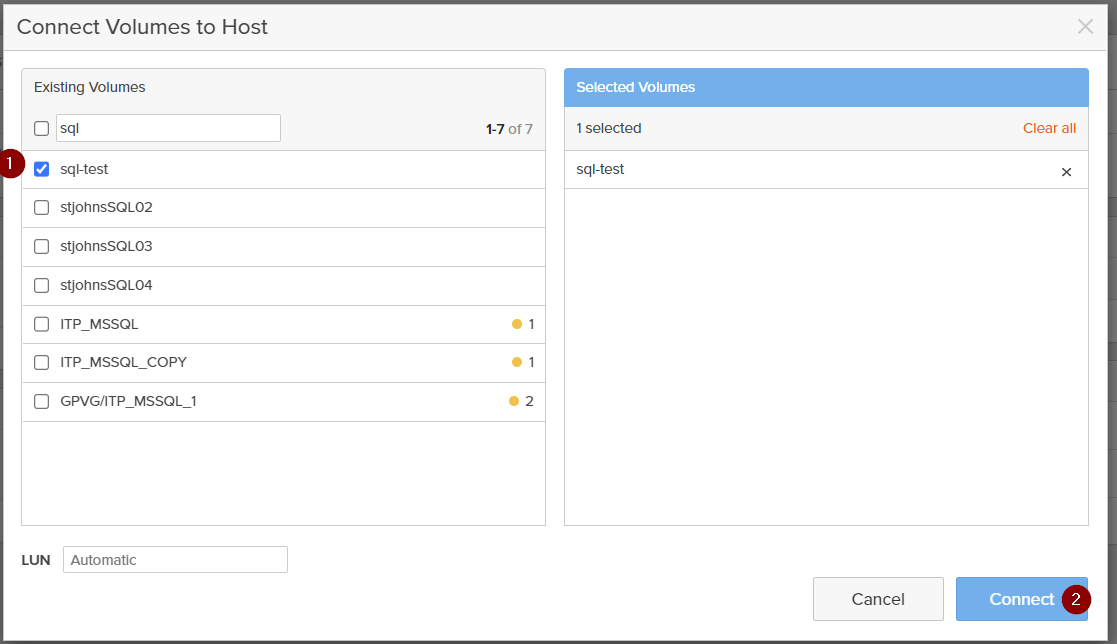
Step 4 – Connect Volume to Host!

Navigate to the host you want to add the volume to. Click on Storage on the left pane > Hosts > click on host name.
Connect the volume. Click on the hamburger, then click connect.
Select the volume you wish to add, then click connect.
Once connected you will see the volume you created under the connected volumes section and you’re done!

Using Pure1 to Schedule a Purity Upgrade

Using Pure1 is the easiest way to schedule a Purity Upgrade. This method allows you to select the array to be upgraded, provides the recommended version of code and lets you reserve a time to do the upgrade.

  • Login to your Pure1 account via
  • Navigate to the cases window by selecting “Cases” under the Support section on the left hand navigation bar.
  • From the Cases Screen click on “Request Service” and select “Upgrade Purity Software”
  • From here Select the array you wish to upgrade by clicking the checkbox. Then select the version of code by clicking on the “Select a version” drop down menu
  • Once selected then click on “Schedule”
  • Select a date and time and click confirm
  • At the following screen, confirm all details are correct. Read through the best practices guide, once completed check the “I have read the upgrade best practices” box. Click “Request Upgrade” and a case will be created. Pure support will then contact you with any further requirements on their end.

And just like that you have scheduled your totally non-disruptive Purity SW upgrade. It should be around 1 hour to upgrade the software. In this time each controller is upgraded one at a time. Pure then monitors your array to ensure that there are no issues post upgrade. If you have any questions contact your System Engineer.

Hello World!

Welcome to my new blog. This space will be used as a newsletter / blog for any news and updates in the Pure storage world. I’ll also dabble with general storage news. Thanks again for visiting and I hope to see ya’ll around!